New Stone Patio!

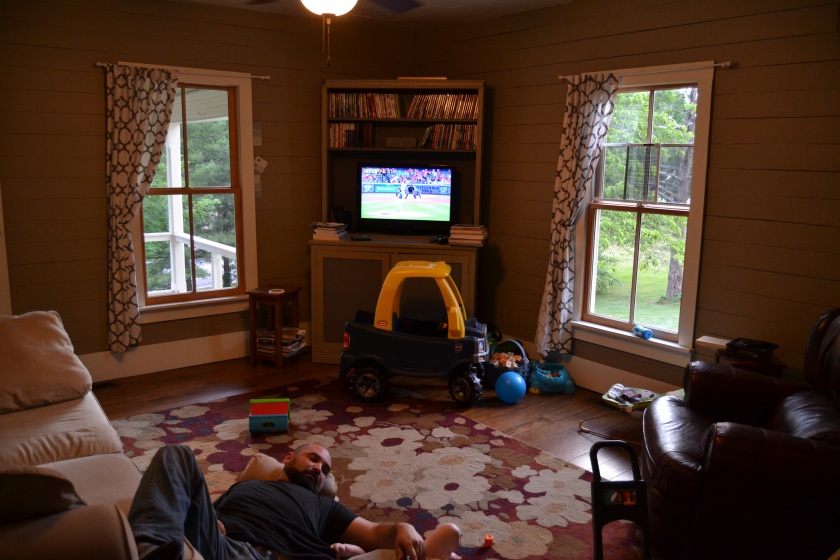
I think one of the most surprising things, at least to me, about owning a home, is the constant reevaluation of how you’re using a space. I know not everyone does this; some people are happy to get their home just the way they want it and keep it that way. I think that’s fine! If you love your space, and it brings you comfort, and it works for your family, and you never want it changed, more power to you. That’s why it’s yours!

However, Pete and I don’t work that way. I can’t count how many changes we’ve made to this house, or even accurately say how many times we’ve moved our bed from room to room. We are constantly trying to make our place work better for us. I’m not sure if it’s obsession with perfection (don’t think so), inability to sit still (more likely, at least for me), or just that we’re both kind of creative types, but we are constantly tinkering with our layout, our furniture, our colors, or in the case of this week, the number of porches attached to the house.

IMG_2586
Look at sweet Sis modeling for me!

This house has a total of four porches for four exterior doors. There’s the big front porch, which we’re ALMOST done renovating, two side porches, and a porch on the back walkway.IMG_2594

IMG_2593

I should correct the above statement, because as of just a couple of days ago, it had four porches. Now it has three. We’ve ripped one off and are replacing it with a stone patio.

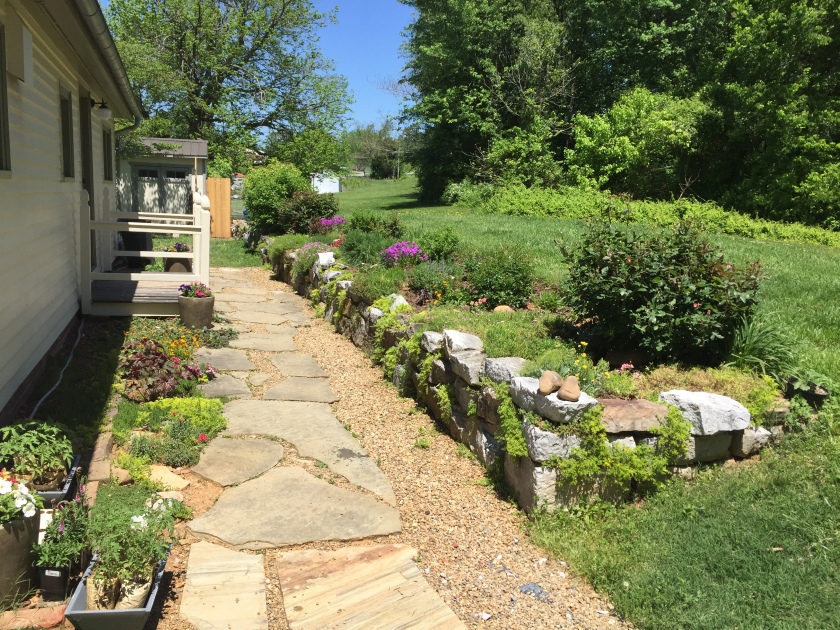
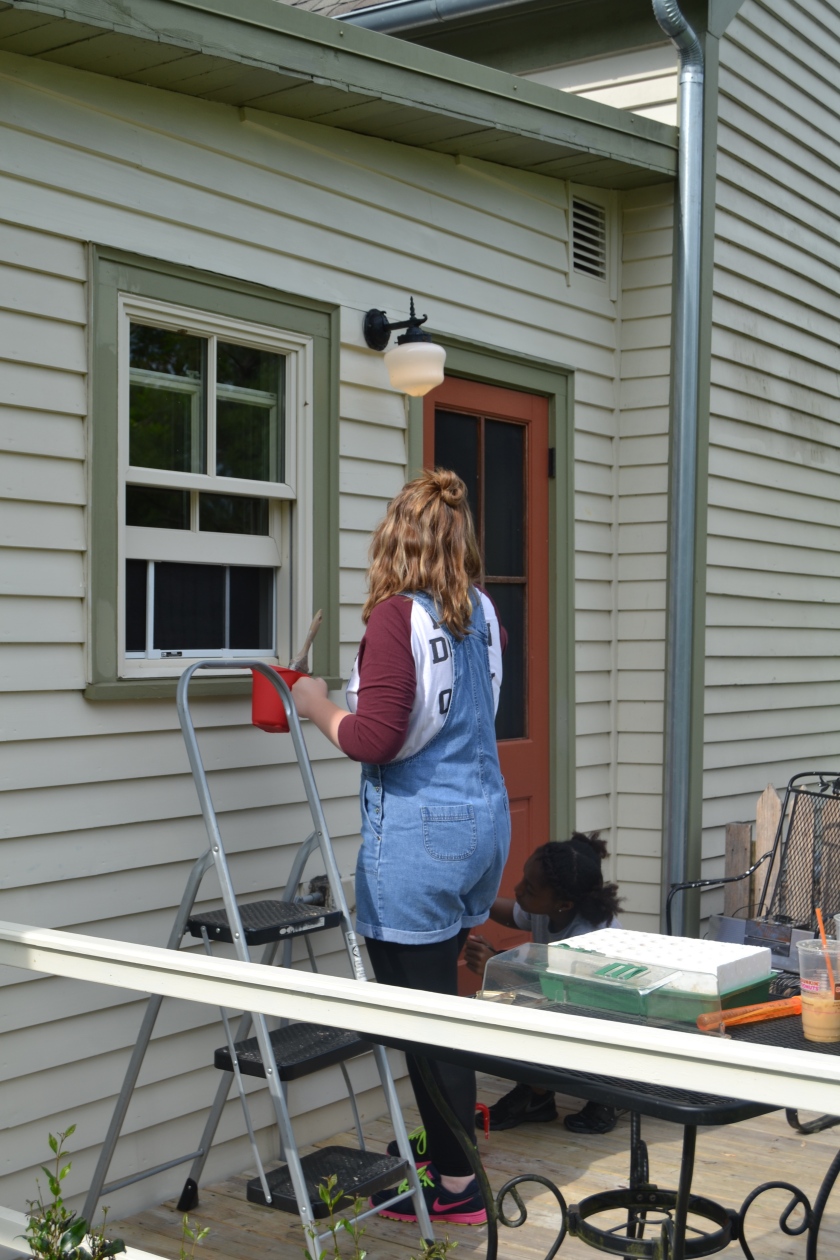
We use the side yard a lot. It’s fenced, which gives me an opportunity to control the Boy, the ducks, and the dog, and it’s flat- the only part of our yard that really meets that criteria. Here’s a picture of the yard a couple years ago when I was working on a couple projects, and a picture of the (no longer existent) porch.

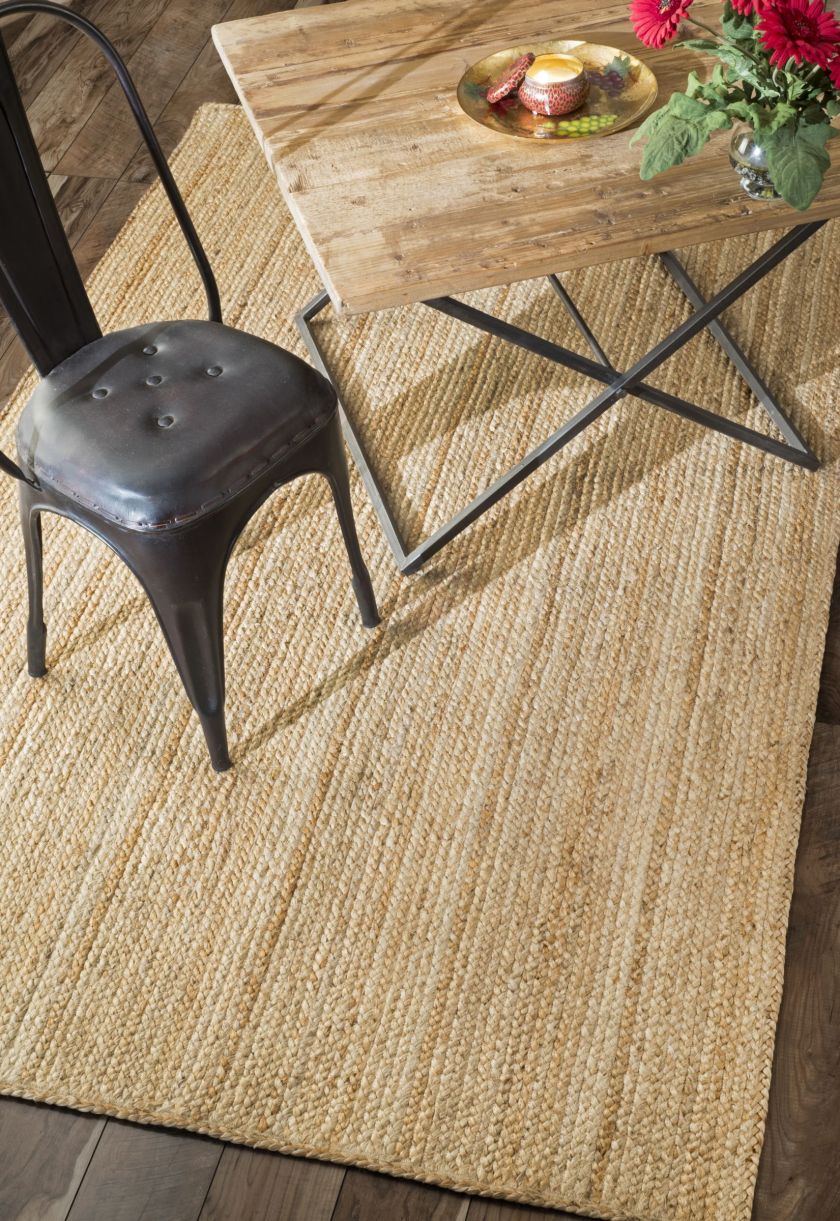
This porch was useful to us, but as you can see, it was a little small for our table and chairs. That’s exacerbated now by the fact that the Boy likes to eat dinner outside, so we need space for a third chair. Additionally, it made the small side yard seem smaller because it was a second level up from the ground. And finally, mowing the side yard was difficult for Peter, since he had to work in a confined space around the porch and garden. This is the new plan:

IMG_2649

We bought 1600 lbs. of flagstone and plan to bury them enough to make it easy to slide the mower over the top of the patio. The privet bushes will get moved, and the patio will extend all the way to the side of the house, curving in toward the house as it goes away from the door. Peter has been digging all week, and he picked up some pea gravel this morning, so once it has been graded and the stones laid, we’ll fill it in to look very similar to the back walkway.

There were a couple other advantages to removing a porch. The first is maintenance-related. Our porches, because of the hot, wet Tennessee weather, require painting yearly. I’m the porch painter, so I’ll be glad to have one fewer porch to maintain. Additionally, I am pretty particular about keeping consistency in landscaping materials, and I’m excited the flagstone walkway that goes around the back of the house will now wrap around to the side yard.

This project will probably go a long way this week/weekend, so I’ll update you next week on it! Hopefully we’ll be sitting out on the patio, sipping sangria and plotting our next move very soon!

Just a couple other photos to show how much non-blogged work has happened lately! I moved a ton of hosta plants from my bursting hosta bed down to the little cedar tree at the bottom of our drive. As in, I dug them up, trekked down the yard with 2-3, planted them, walked back up, and brought back more. And then lugged buckets of water down to water them in. It was brutal, but a good reason to skip the gym once last week.

This little garden has our historical marker in it, and I’m excited for the hosta to get acclimated and fill in to create a really pretty little bed!

IMG_2587

I had even more hostas to split, so the other tree at the base of the yard got some, too, but they’re big and droopy and needing to acclimate and then get trimmed back so they can put on some new, strong stems.

IMG_2589

A lot of the goal here is simplifying mowing around the lower-limbed trees. Pete has to get under here with the riding mower, and a hosta bed means he can just do it in one turn without smacking his eyeball on a cedar limb. Never underestimate the impact of nicely-landscaped trees in your yard. If we stay here for many more years, I expect I’ll have little beds like this around most of our trees. It’s pretty and makes for easy yard upkeep. Just a yearly application of mulch to keep the weeds back and you’re good to go!

Alright, I think that’s the run of it. I’m pretty proud of how the property is looking this year! I think we’ve taken it a long way, and I’m excited to see how much more functional and pretty our side yard is with a stone patio.

IMG_2588

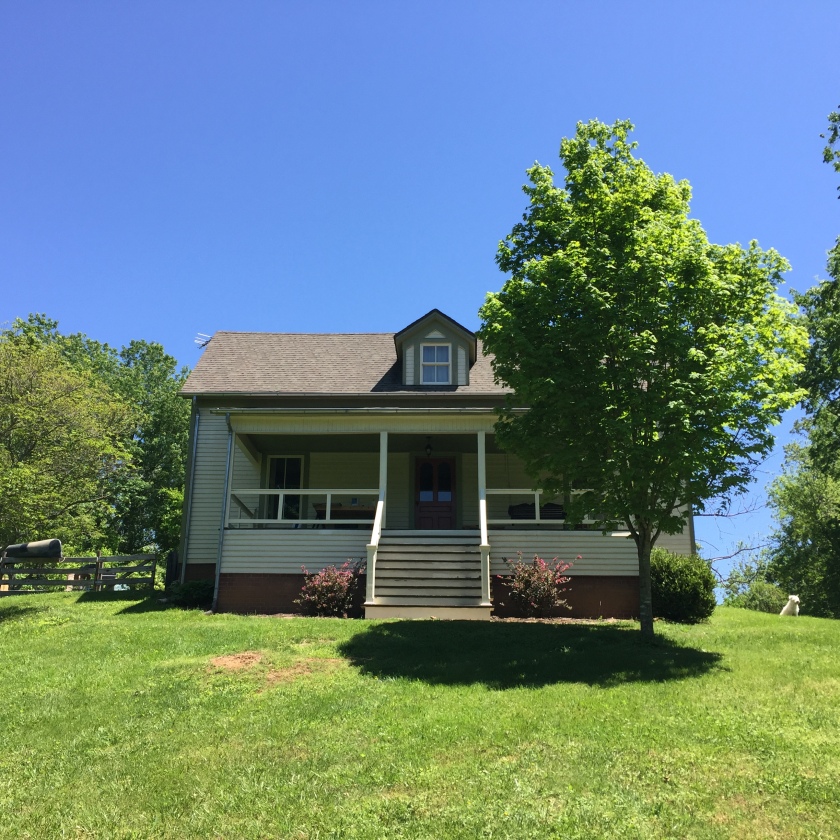
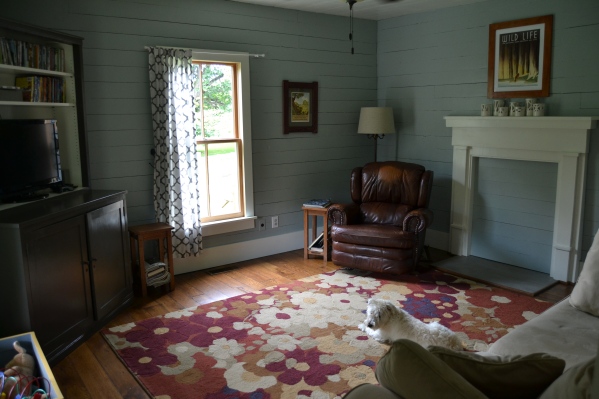
Such a pretty, sweet old lady.

All the best, guys!!

Progress in Pictures

Pete spent the weekend drywalling the new bathroom. So there are half walls now…

DSC_0257

DSC_0258

DSC_0267

Above, the view from what’s left of The Boy’s room. Imagine that cut-off doorway moving about 4′ toward you. That’s how we’ll end up with a tiny hallway with a bathroom to your right (as you walk toward yourself in this picture) and the new door to The Boy’s room directly ahead of you.

DSC_0266

Next steps include flooring, wainscoting, painting, trim boards, and the building of both new doors and another wall to finish out that small hallway. Oh, and repainting The Boy’s room, probably. Yikes.

And the installation of fixtures, including this cool sink I found online:

DSC_0268

It’s a very small pedestal sink, but it has an Art Deco era feel to it. I’m looking forward to seeing it up in the room. And I chose an easy-to-do piece of “art” for the wall, too, and it’ll take advantage of another free historical resource, so look out for that!

I spent the weekend giving the back of the house a new coat of paint and new trim paint, all while chasing The Boy and watching the dog (who had to be tied up, much to her disappointment and frustration). It looks pretty sweet back there now.

DSC_0261

Porch paint will happen when we get all interior renovations, especially those including drywall, finished.

DSC_0262

Nothing matches old windows.

DSC_0264

And finally, never underestimate the potential of one of the broken babies (or as my Grandma Noel would say, beebees) on the discount rack at your local home improvement megastore. This Drift rose was so sad when I saved it for $3 last year! Look at her now!

I Sewed a Thing!

So, yeah, it’s been a while (again). Just busy, no real other excuses. And the stuff we’ve been working on hasn’t been pretty stuff that’s fun to read about, either.

Like this:

DSC_0215

DSC_0216

My dad came down and wired our new bathroom for us. He did an awesome and astoundingly quick job (I suppose a long career as an electrician will kind of make you an expert), and we were so thankful not to have to call in an electrician. Especially after Pete cut through a wire with a Sawzall and melted the blade.

And this:

DSC_0213

Our old wooden house is needing a coat of exterior paint. I’ve been slowly working my away around the house with a power washer to prep. Last weekend, Peter’s students Mamie and Aaliyah came out for a few hours to paint a couple sides of the house. We’ve got a long way to go, but we were really appreciative of their work.

And, I guess one exciting thing has happened: I finished my sewing class and am now venturing into the world of doing things alone and unguided!

I meant to write more updates while taking the class, but life. Anyway, when it came time to start trying to do something completely by myself, I decided to start with a simple curtain with back tabs. I already have a curtain for the back entrance to our house, and I really love it, but I wanted something small and doable for my first project. And that curtain is adorable, but sometimes the yellow gets to me and I need a break from it. I want to keep loving it!

That said, I knew there was a pretty good chance I’d screw it all up, so I picked some seriously cheap-o fabric and started trying to figure out how the curtain was made. I went with a white fabric with ships all over it. No, I don’t love it, in fact, I kind of hate it, but I knew The Boy would like the boats, or “butts” as he calls them, so at least one of us would get a kick out of my first project.

IMG_0846

A couple hours and NO MAJOR SCREW-UPS later, I had a serviceable curtain with back tabs that protects the neighbors from our pajama-clad forms when it’s dark outside. The Boy does, in fact, like the “butts”, and I learned a lot, including what I do and don’t like in a pattern and that sewing short lengths is way harder than long lengths! I might actually make one more curtain now that I have a basic understanding of construction and can focus on picking out a fabric that I love. I’m going to attempt a lining, as well. This will be the curtain’ed’est window in the house!

IMG_0845

I also have a pillow project in mind, and plan to try to make my own piping for it, so wish me luck!

EDIT: Oh, and I successfully let out and hemmed a pair of seersucker paints for myself over the weekend, again, figuring it out as I went. Can you imagine how the world has changed for me? The world of pants?!? Let’s just say that cute pants almost never come in talls, and when they do, they are never on sale.

IMG_0858

Yes, I wear socks with my boat shoes at work. I work in a library. It is cold. And yes, I wear boat shoes at work. No, I cannot tie leather shoestrings.

Closets Part III and a Specialty Lumber Yard

closets2

DSC_0109

Well, the closets are painted. I still really like the color a lot. I feel like it goes nicely with the ceiling without competing with it too much. The next step, of course, is the doors, and that’s a step Peter has to do mostly on his own.

A step that called for a road trip!

Pete will be making the doors out of pine. It’s the most economical option, and since I’ll be painting the doors, not staining them, the color of the wood doesn’t matter all that much. What does matter, however, is that the wood be high enough quality that it won’t warp or bend, that the boards be straight when we get them and stay that way.

Wood from big box stores, like our local Lowe’s, can be a problem that way. Their “white wood” isn’t really pine, though everyone kind of assumes it is. It’s actually a fast-growing wood from New Zealand (this info via Pete). It tends to be low quality and it’s often warped or has huge knots and/or dents and splinters. Pete didn’t want to spend time making paneled doors with hand tools, only to have his doors warp and not fit correctly in their frames. (By the way, I was the one who requested doors that sit inside the frames instead of on the outside of them…so it’s kind of my fault that the doors have to fit so perfectly. And be more difficult to make. Oops.)

Enter Jeffries Fine Lumber south of Knoxville, TN (link is to a news article from 2012).

IMG_0472

Last fall, via some online forums, Peter found out about a locally-owned fine lumber warehouse in Knox County; we took a date day in November-ish to go check it out. They supply all kinds of lumber from all around the world. It’s all really nice, high-quality stuff that you couldn’t find anywhere but a specialty lumber store.

It’s a little out in the middle of nowhere, in a big industrial park, the kind where one wonders if they’ll make the evening headlines. But once you find the green warehouse and step inside, you find some  really  cool stuff.

IMG_0473IMG_0482

That right there is zebrawood. It’s beautiful and I’m in love.

This Saturday, we took the Boy along, and he had a blast scaring the crap out of me. He helped push our cart and his life was made when the owner drove a forklift past him.

IMG_0481

Child, you’ll never have to tell anyone you had an “average” childhood.

Pete found his southern yellow pine (locally-sourced actual pine) and had it cut to size to fit into the station wagon. Our kid-hauler becomes a wood-hauler sometimes. This is a recent picture of my seating arrangement when Pete decides to buy wood when we’re driving the station wagon (not from this trip).

woodcar
Don’t worry about my head, love. I’ll just hold it on my lap.

We brought the wood home and Pete’s next project will be to make those doors. Get on it, love. You don’t have anything else to do, right?


Building Closets in a 1900 Home (Part II)

We continue plodding along on the closets. This weekend, I filled holes from the brad nailer, but I don’t have pictures of that.

On Sunday morning, I primed the whole thing.

primed closets

Priming took forever because the wood soaked up so much of it, and because Peter used the primed side of most of the plywood inside the closets. Thanks, honey.

But those will get painted someday, too, so it’ll just save me time then instead of now.

Sunday afternoon, the closets got their first coat of paint.

I’ve been telling Pete for years that we needed to paint this room. When it was a living room, I leaned toward a warm, light gray to make the crown moulding pop against the original milk painted ceiling. I was afraid any real color would compete with the ceiling.

When this became our bedroom, though, I realized how lovely it was to have it white. I’ll take daytime pictures when this space is done, but suffice it to say, it is really nice during the day. One of the windows is a south-facing window, so it lets in really nice sunlight and the white has made this a really airy room. And, I’m slowly coming out of my gray period and looking for ways to add a little more understated color to the house.

So, I’ve decided to keep the room itself white (though it will get a fresh coat because the white in there is a little dingy and there are lots of little damage spots after a few years of living there). I’m sure Pete is relieved (though he secretly agrees that the gray in the dining room was the right choice).

On to the closets. I don’t know why, but the first time we drew up this plan, I wanted those closets to be navy blue. I’ve never really deviated from that plan. I knew the blue had to be the right blue, with lots of gray in it. A classic blue would really clash with all the green tones in the ceiling. So I chose a color called Volcanic Ash from Valspar.


volcanic ash

It’s a dark blue with gray and even brown undertones. The first coat went on in a semi-gloss on Sunday afternoon.


DSC_0133

Pete asked if I wanted him to take my picture. I said yes, because I tend to not exist on this blog, but that I preferred that I not look at the camera. See! I do things!

One coat is on, and so far, I really like it. It’s dark and dramatic, but I don’t think it competes with the ceiling at all. The white iron bed will pop in front of it, and I’m picking out a piece of art or two to put on the shelf.

Here’s another picture I took with my phone when the first coat was done. I’ll probably finish it up later this week and we’ll move the bed- and then Peter can continue hating the fact that the doors aren’t done yet until he has time to build them.

closetscoat1

Building Closets in a 1900 Home

I don’t usually post twice in one week (because I don’t have two posts’ worth of stuff), but I also don’t want to be recapping this weeks after it happens in order to keep blog posts going, so here! Second post of the week!

When we bought this house in 2012, Peter convinced me to make the room right off our kitchen the bedroom. Then, we moved upstairs, partly because the bedroom upstairs had a closet, and partly because of other reasons I don’t remember.

We moved back downstairs (next to the kitchen) after our son was born because we decided to co-sleep and needed more space for his crib to push up against our bed.

Earlier this year, though, I realized how much better the flow of the house would work if we a) moved to the other large room on the first floor, which was being used as the living room, and b) sealed off the doorway between that room and the dining room. So here’s a quick pictorial rundown of that shift.

blueroom2_house2012
Original living room.
DSC_0598
Original bedroom, in the middle of the switch.
DSC_0103
Bedroom a few days ago, including laundry, Hobbes, Foxy, and the back of the dining room cabinet, which we used to close off the doorway.
DSC_1224
Dining room with a mostly finished cabinet blocking the original doorway to the new bedroom.

So, the biggest issue with the new bedroom set-up (and the old one, for that matter) was the lack of closet space. Old homes, as a rule, have very few closets, which makes sense, because people had very few articles of clothing. Neither of the rooms on the first floor were originally bedrooms, so neither of them had closets. We were using the laundry room as a closet, but I wanted to make sure we had closets in the new bedroom for two reasons: I wanted closets, and I wanted to be sure we could call that room a bedroom when we sell the house.

Peter also liked the idea of getting the laundry room as a tiny little in-house shop once the clothes were out. The things I do for that man. Or, let him do, I guess.

Pete and I hemmed and hawed, and eventually, with the help of a little research (which is a fancy word for Pinterest-ing and obsessively reading home blogs and Old House Journal), we settled on something like this to solve the closet problem:

cropped-closetplan_2015.jpg

The design called for closets on either side of the (now sealed-off) dining room door, with paneled doors and shelving/storage between the closets. We’d put our queen bed between the two closets, leaving plenty of room for someone to put a king bed there if they wanted to.

We started the project over the holidays, and the closets themselves are now finished. The doors will take a bit of work, as Pete will build them from scratch.

DSC_0087
Closets go up…

DSC_0088

DSC_0091
Peter built a box between the closets. It now has a storage compartment above it and space for lamps or whatever else on either side of the bed.
DSC_0093
Pete started adding trim to the top…
DSC_0101
Moulding on the tops of the closets and above the shelf.

So, the main structure of the closets is built. I filled nail holes in on Wednesday evening, and the next step is painting. That’ll be another post, because settling on a color for a room with a turquoise milk painted ceiling has taken me literally years.

Wanting Too Much Too Quickly

Shew, I started this post like four weeks ago. But then The Boy brought home the plague, which we carried to and apparently spread around Illinois, and then gave it to me. He went on a voluntary hunger strike while we were traveling, and I haven’t had a decent night’s sleep in two weeks. We’re still in recovery from a pretty rough Christmas trip. But I have lots of updates because, regardless of this, we got going on the bedroom renovations… more on that in a few days, though. And when I say “we got going on the bedroom renovations,” I mean Peter did, because I was laid low with the Tennessee Crud.

I’ve been realizing lately that I am guilty of wanting too much too quickly with our home. And I think that ties into something kind of like delusions of grandeur? Well, at least a tendency to forget where we are in our lives…


We bought this house in 2012 as a (fairly) newly married couple. We moved in on the weekend of our first anniversary, and since then, have made some significant changes that (we think) really make the place more pleasant.


(Ok, so it’s pretty cool WordPress let me group images like that!)

I think, though, every time we work on a space, and take it a little further down the road, I want it FINISHED, and I want it perfect, even if that means I’d render it unlivable. As in, it will be beautiful and sweet and light and adorable and NO ONE IS ALLOWED TO WALK IN THERE WITH A SIPPY FULL OF JUICE.

Getting too worried about a space usually means a few things. I spend hours online looking for the things I “need” for the space- rugs, curtains, doo-dads in the right colors. I Pinterest and I go nuts reading blogs. Somewhere in the midst of it all, I start thinking about spending outrageous amounts of money and I get a bit big for my britches and start thinking “other people do that, spend lots of money on their house and decorations and stuff, why not me???”

And then it starts getting boring. I read the same stuff over and over again, and I start seeing that it all looks the same, and I start thinking about the fact that we’ll have a toddler for a while now, and will probably never be dog-less, and we’ll always be LIVING in our house, not staging pretty blog photos. To be honest, I end up feeling like a poser every time I try to make it pretty for a photo. It doesn’t much reflect real life in these spaces…

DSC_0876DSC_0106

I hold off on the purchase and decide we’re okay for right now, or I finally give myself the creative freedom to figure out what I really want for the space, not what all the pictures on line say will be perfect. And hopefully, in the end, it doesn’t look like a Pinterest photo. It looks like home, instead.

And then I do the whole thing over again when we get some work done.

I’ve been obsessed with getting a new living room rug lately. The one that was in there was a rug we bought when we had no money and needed something to cover the floors. It has tons of pulls in it, and Maggie has had a few accidents on it. I painted the living room blue knowing that I was going to try to find another rug, so my ability to love the new color has been held up by this rug.

DSC_1213

I’ve disliked it for a long time, so I’ve been hunting. HUNTING. Pinteresting. Shopping for deals… and trying to justify spending more money than I should to get a real wool rug. I really want to go more “real” with the fibers in our home, and I know wool rugs last a long time. But there is also the knowledge that a dog still might pull at it, a toddler might stain it, and Pete still doesn’t have his own shop space, so there WILL be sawdust footprints on it.

After months of looking (and even deciding on one and telling myself to wait until it’s on mega-sale, which would still be more than I wanted to spend), I did some soul searching and realized what we needed was a rug I didn’t mind, that hadn’t been soiled by a dog, that washed well, and didn’t break the bank, as it will be used in our main living space. We are in a season of compromises in our lives.

Ultimately, I settled for this: we’ve moved the rug from the dining room into the living room, keeping it nice and neutral under the blue grey (which I finally really love with a neutral rug).Pics of that soon.

I found a 75% off plus free shipping on a jute rug for under the dining room table. It should stand up to the use pretty well, it’s a natural fiber, and at $118, I don’t feel one bit bad about the price tag.

juterug
Photo from RugsUSA

It came in while we were traveling over break. I’ll post pictures as soon as I’ve got the rooms cleaned up. Insert “traveling/sick/exhausted” excuse here.

I’m excited to feel like the living room better reflects our tastes, but that the whole situation didn’t break the bank. And I’m trying to remember to furnish our home for US, not for comparison to the blogs and pins and photos online. I get so caught up, despite proud declarations on the “About” page, because it’s so easy to want it all perfect right now. I have to remember the point here: to make a home that fits our life and our needs. That means taking our time to make or find the right things, not rushing out to buy all the accessories that are the right color to match all the other stuff.

Blog - Social Media for Librarians

...is worth doing right.

Sewcialists

A Sewing Blog for Everyone

oonaballoona™ | by marcy harriell

...is worth doing right.

True Bias

...is worth doing right.

Buzzmills

...is worth doing right.

Mrs. Hughes

Retro Inspired Sewing

Cloning Couture

Exploring the world of couture sewing

Thread Bear Garments

I like to sew.

try curious

...is worth doing right.

American Duchess

...is worth doing right.

Andyland, USA

...is worth doing right.

The Dreamstress

...is worth doing right.

Blog - Made by Rae

...is worth doing right.

Francois et Moi

Making a Handmade Modern Home one DIY project at a time.