The Best Changes We’ve Made (So Far)

I write this blog partly to chronicle the challenges we face and the changes we make in our historic home, but I also write it to give myself the proverbial pat on the back when I’m feeling stuck in a “no progress” rut. Today is one of those days, so I’m taking a look back at most useful changes we’ve made over the last 5 years (oh, my goodness!) in our 1900 home.

cropped-image.jpg

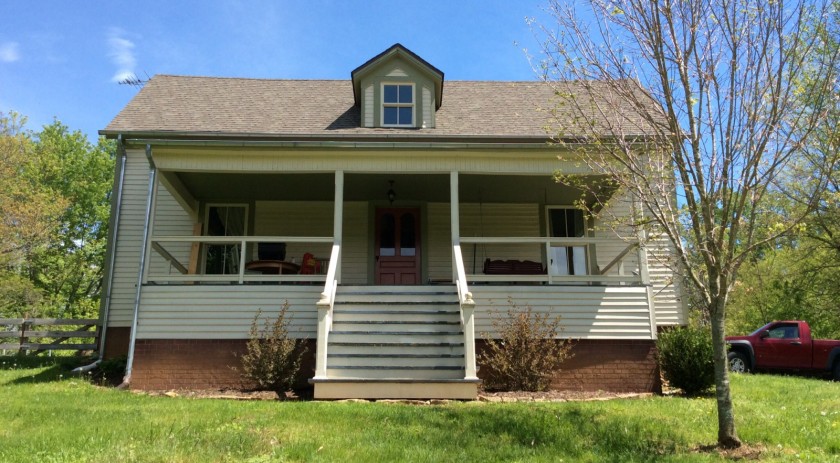
When we made an offer on this house, it was in newly-renovated shape, and the previous owner had been very specific in some of his choices to preserve or restore much of the house’s historic character. Oh, man, did I respect that, but I was also pretty adamant to Peter that I didn’t want to move into a museum where we couldn’t make changes without offending someone or feeling guilty. I didn’t necessarily like or agree with all of the renovations, but I understood the owner’s intentions and agreed with his general philosophy. Pete didn’t think my concern about the museum thing would be much of a problem, and in the spirit of the house’s first renovations, as we’ve gone along, we’ve made sure that changes we make look like they’ve always been there. We’re particular about style, colors, materials, and the house’s original floorplan; our goal is to make the house a place the original owner, Mr. R. O. Huffaker, would least feel comfortable visiting even if he didn’t really recognize it.

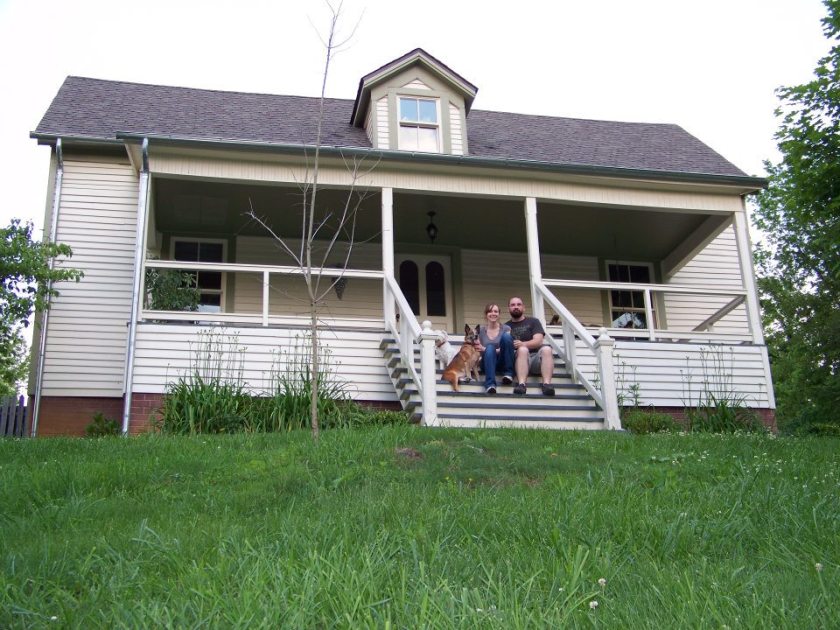
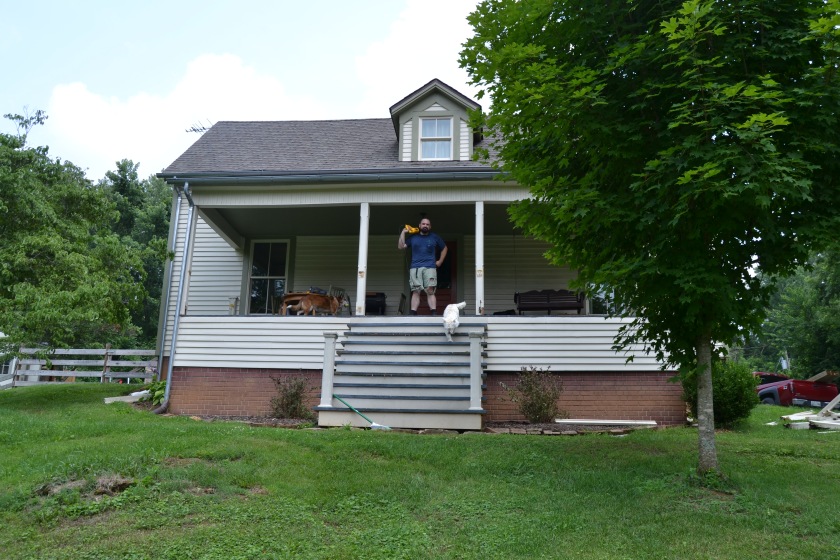
We moved into the R.O. Huffaker House in May, 2012. Here we are, new homeowners.

frontelevation_house2012

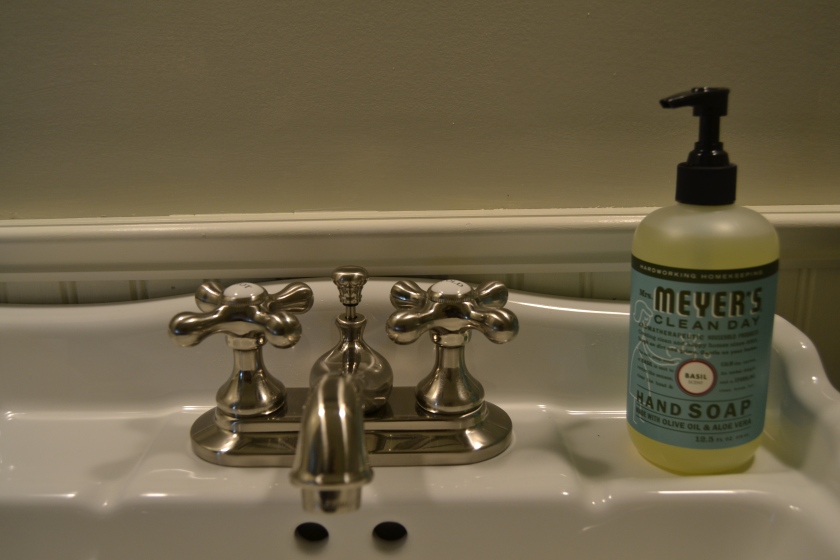
The previous owner had done some major renovations on our 112-year-old house, including new electrical, plumbing, windows, and roof, but as we lived in the place, we found some more things we could do to improve the house’s function as a family home. I’ve drawn up a list of a few of my favorite DIY changes we’ve made to the place: the ones that had the greatest impact on how we lived in our space, how the house flowed, and how it will hopefully sell when that time comes.

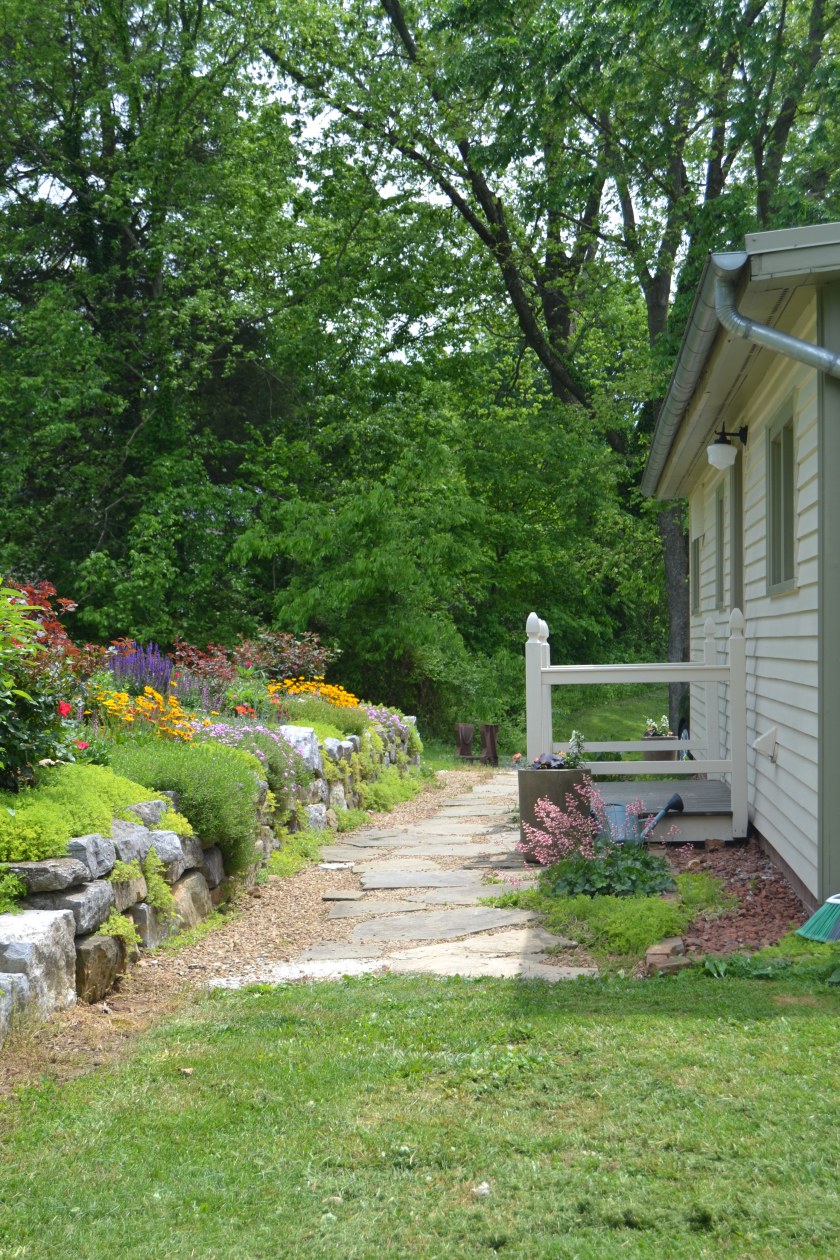
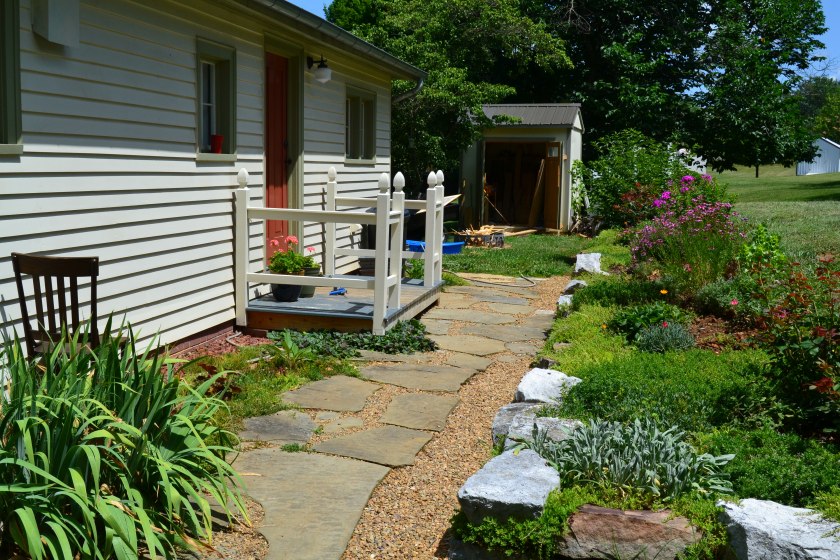
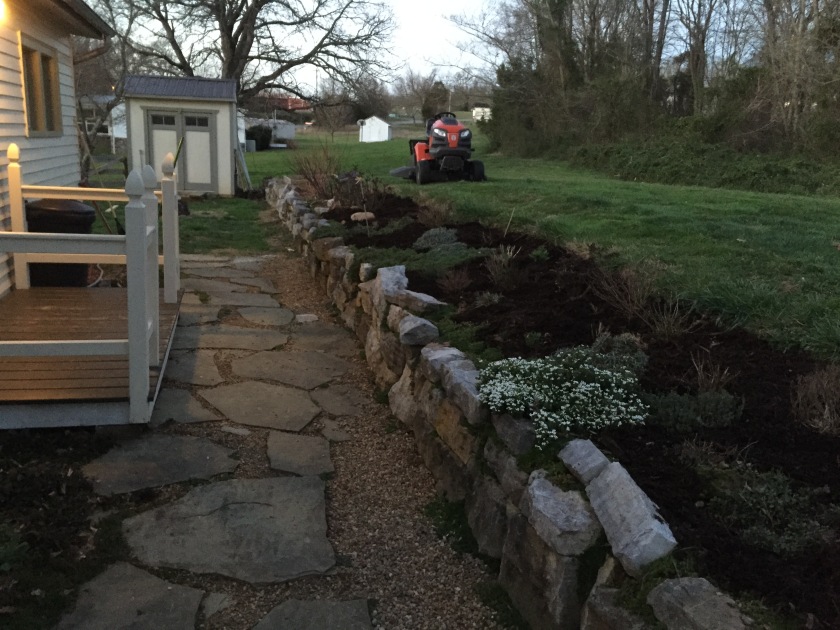
French tile in the back walkway.

We (and most visitors) enter our house through the back door. When we moved in, the previous owners had made a valiant attempt at turning this into an herb garden, but there were serious drainage issues which made almost every plant rot in place.

reargarden_house2012

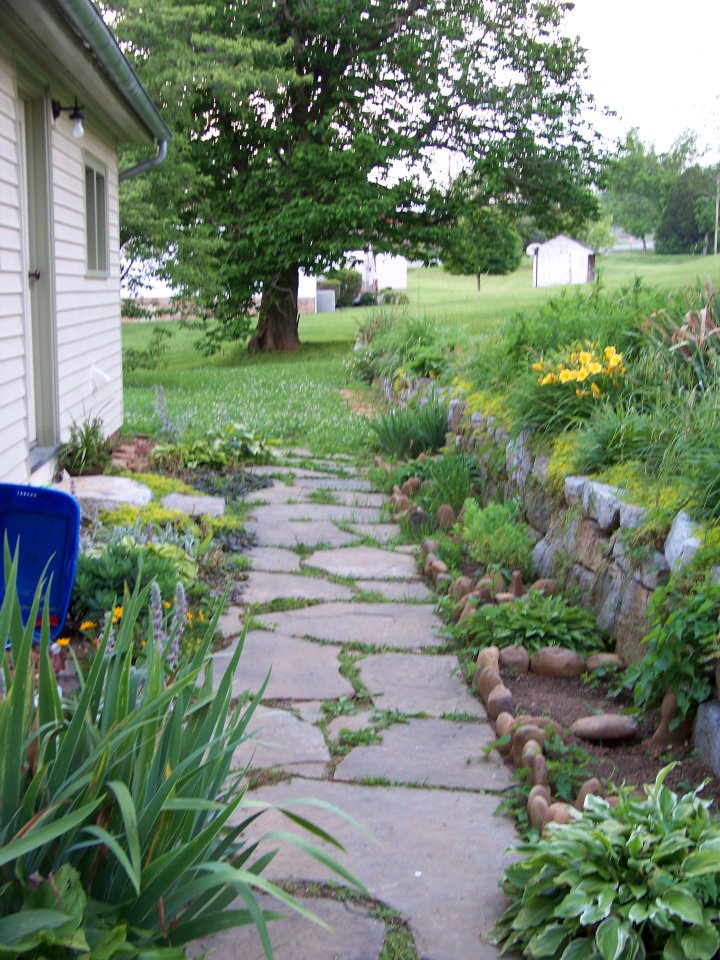
The ground got muddy, the dogs trailed it in, and we worried about water on the floors and in the basement. So, we got to work digging out the dirt by the rock wall, laying in a French tile, and covering it with pea gravel. The garden drained better and it was easier to walk back there after a storm.

DSC_0252

Painting.

This is an obvious one, right? But seriously, some weird paint schemes were happening inside and outside this house. I’m very particular about my color schemes not jarring me as I travel from one room to the next, so it was important to me that we tackle some of the flow issues created by an incoherent paint scheme.

For example, avocado green trim in the kitchen was turned charcoal grey…

…dark army green rooms were painted a nice blue grey…

…the fleshy peach hallway was painted bright white with high contrast doors and furniture…

…and even boring doors were made inviting with a nice paprika color. Painting is the cheapest way to change the feel of a room or an exterior, but it makes a huge impact. I haven’t regretted any of these paint decisions.

Replacing the back door.

The mudroom was a deep, dark cave with no functionality, but fixing that was a bit of a challenge on the materials front.

mudroom_house2012

Every door in this house is a weird size. When we looked at the back mudroom area and started talking about adding a door that had a window in it, we knew it would be a challenge to find a door that came even close to fitting in the frame. We didn’t want to order custom, and we kind of wanted an old door, anyway, so we went to the local salvage warehouse and got lucky with a door that was the right width and just needed to be lengthened. Pete built a drop zone featuring a bench with a hinged top and Shaker-style pegs, and then we got to work switching the doors.

3mdrm

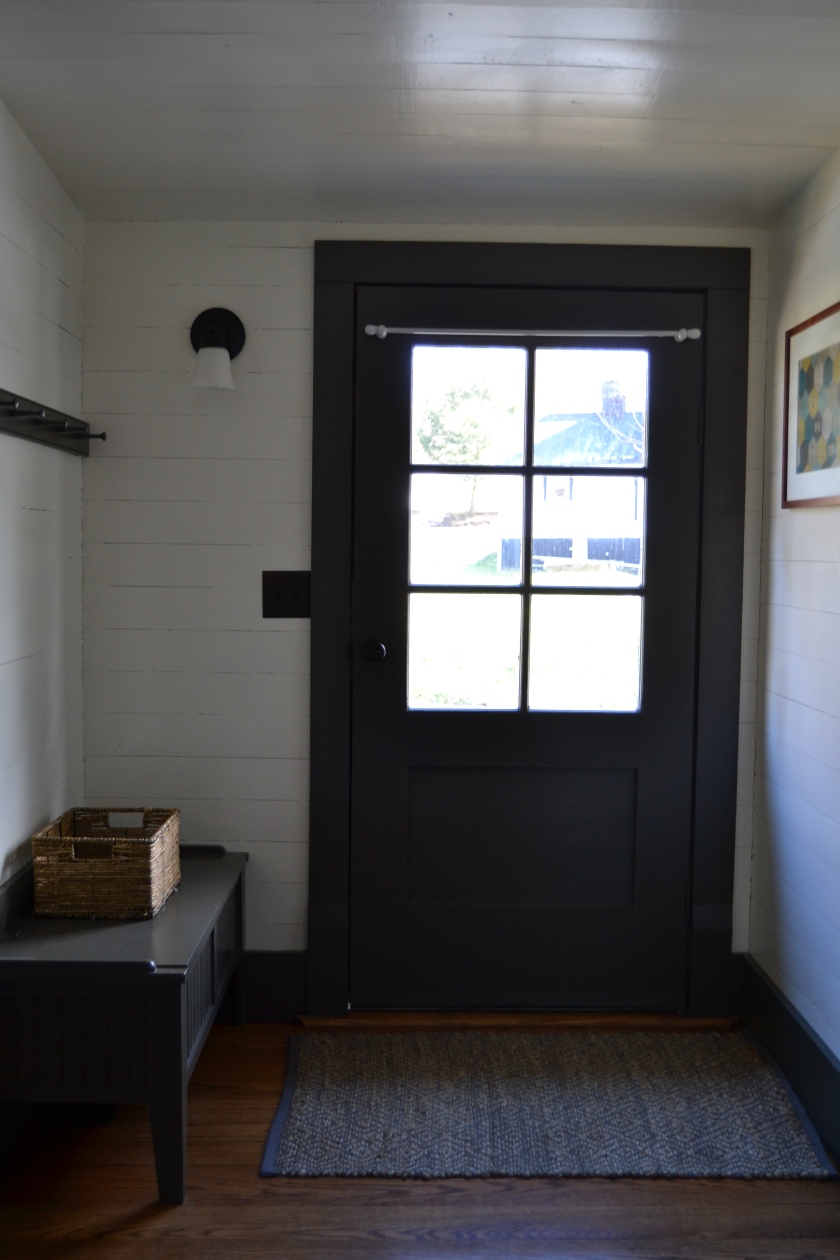
The result was lots of light and a functional space to drop bags, shoes, and keys.

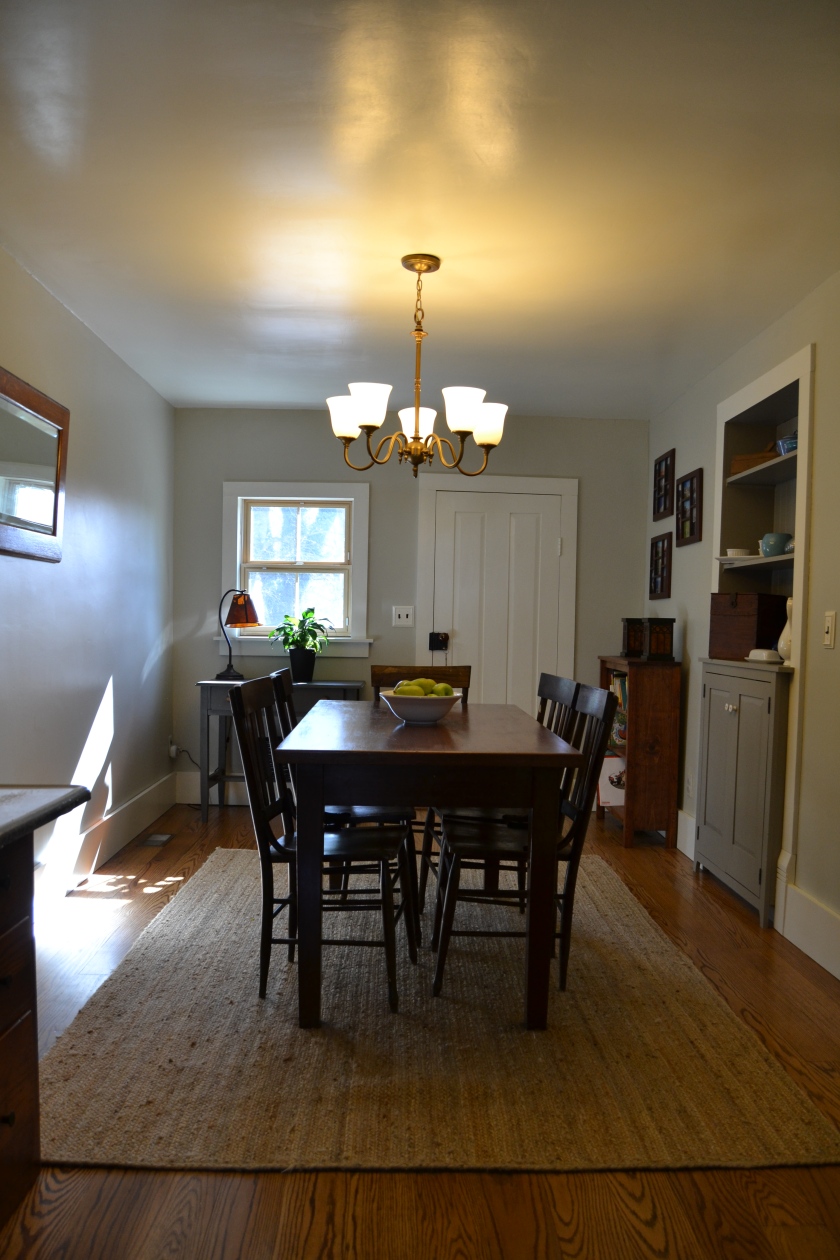
Window in the dining room.

Similar to the mudroom, the dining room had no window. We saved up and added one and turned it from this…

dining2_house2012

…to this!

6dngrm

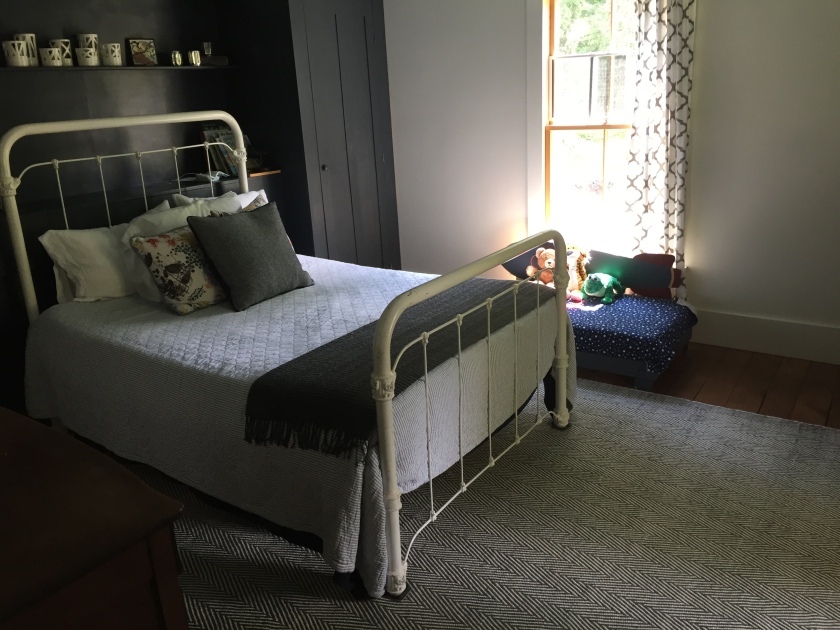
Sealing off the Master Bedroom.

We played musical bedrooms a bit in this house, but once we had finally decided where we wanted our bedroom, we needed to seal it off from the dining room. See that grey built-in cabinet in the photo above? That was the dining-room-side solution of the two doors problem. Peter built it to fill in the doorway between the two rooms, and it functions well as a side board and as storage.

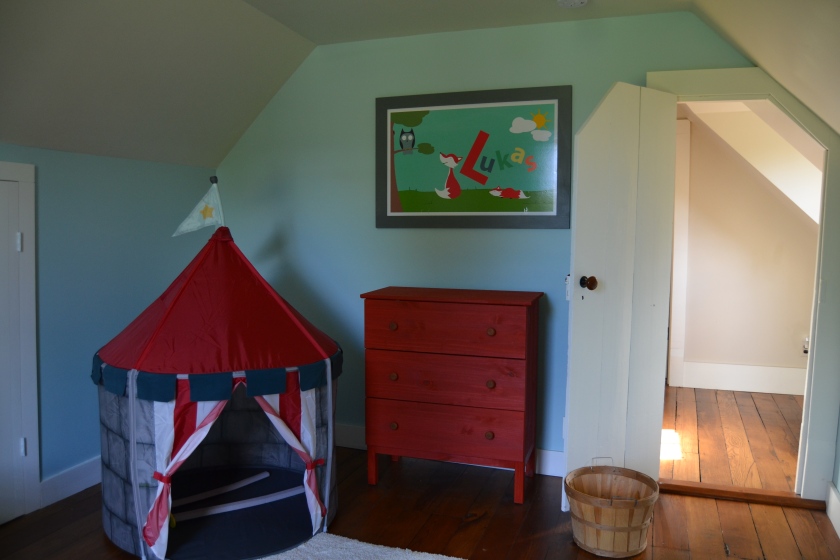
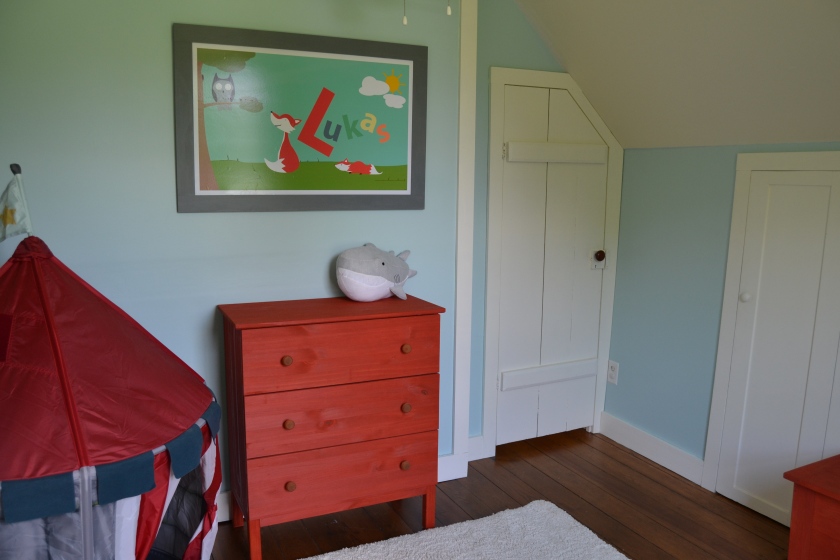
Adding closets to master.

The other side of that wall also needed something to cover the doorway, and we needed closets in what was now the master bedroom. Most rooms can’t be called a bedroom on a real estate listing unless they have a closet, so we worked on adding two closets, one on each side of a convenient place to put a bed (though you could totally turn it around and make the wall installation an entertainment center). Behold, our master bedroom closet situation.

DSC_0122

rug

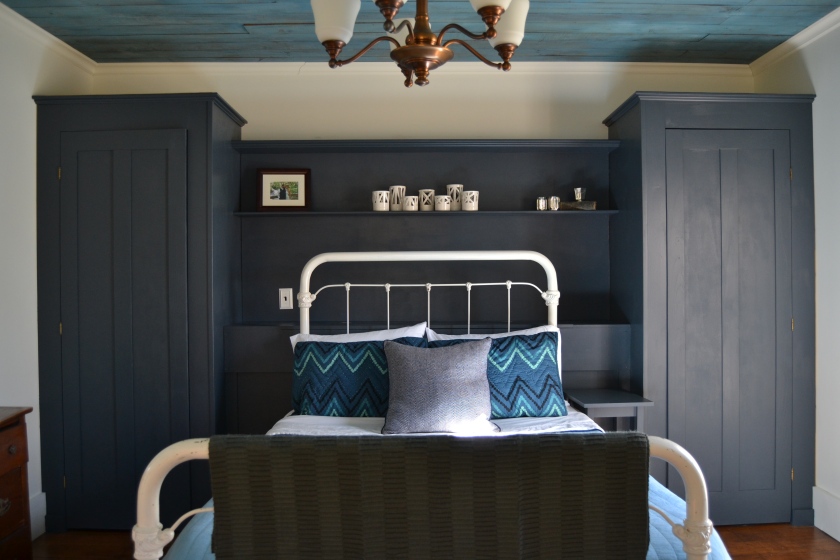
Just imagine a hidden door behind the shelves, and you’ll have a good picture of how we changed the layout here.

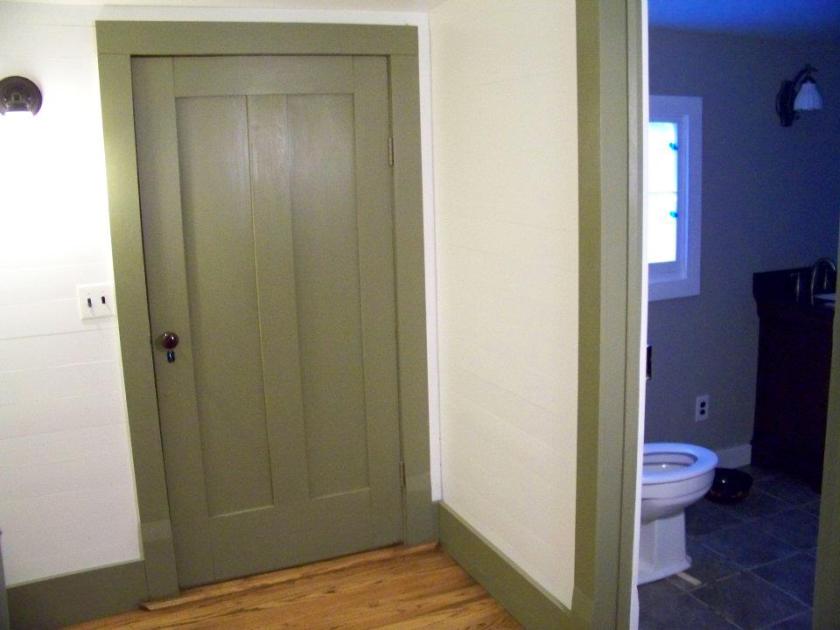
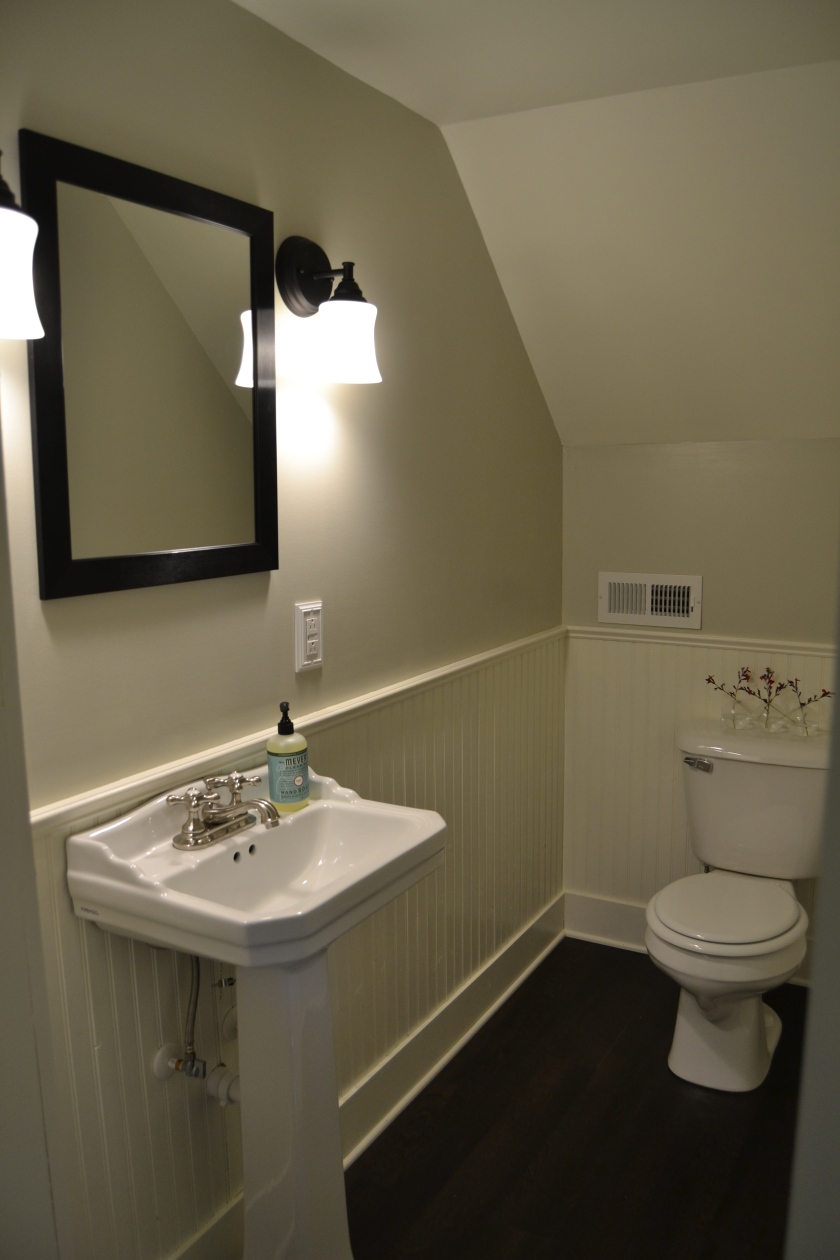
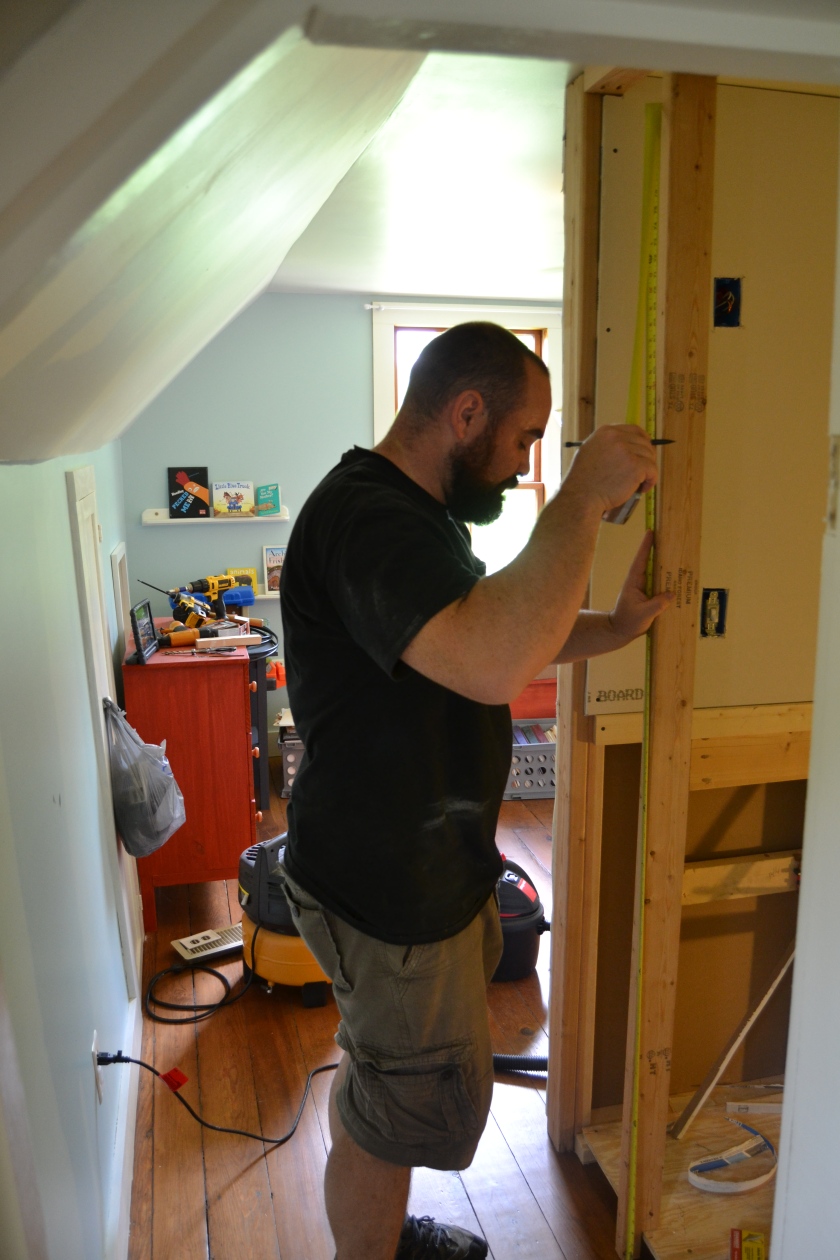
And finally, adding a second-floor bathroom.

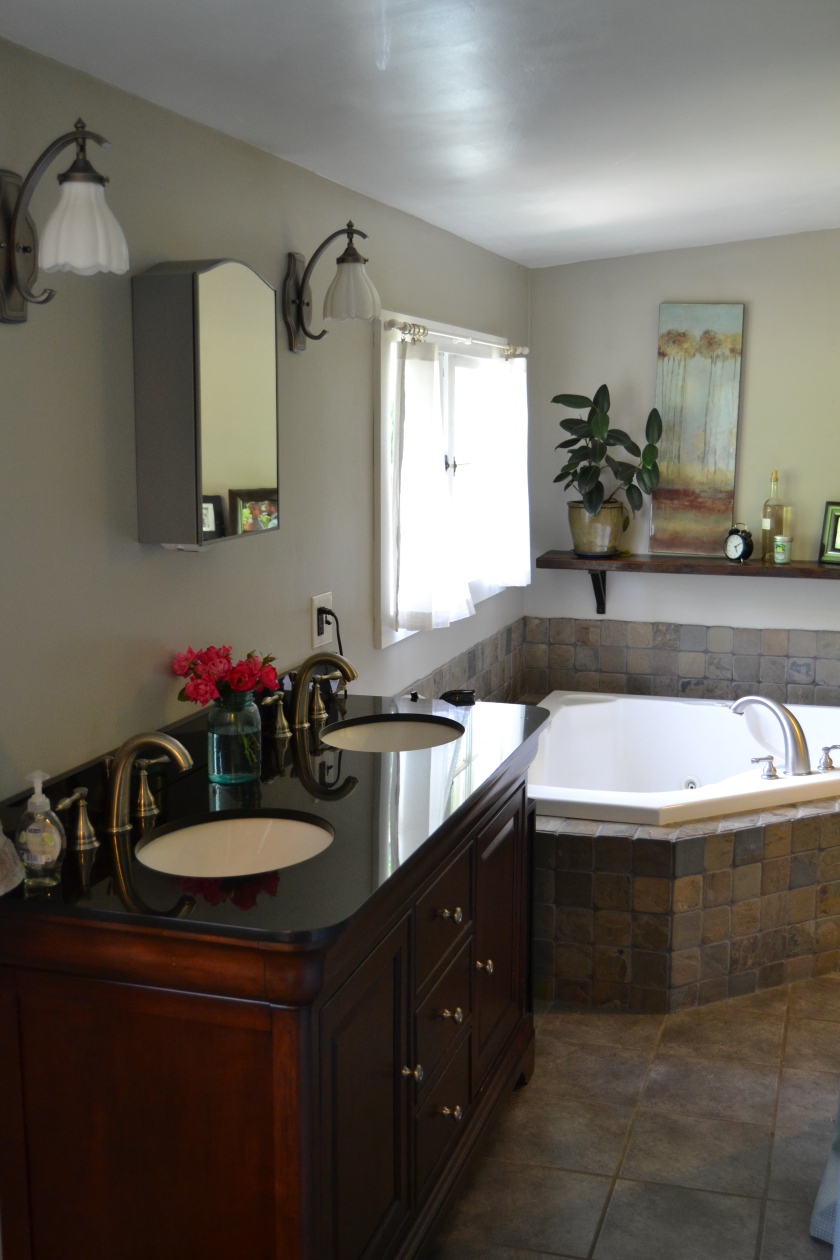
Our house didn’t have an indoor bathroom when it was built in 1900. Over the years, previous owners added one in the hallway, and then the renovator who owned the house before us (quite correctly) removed it and built an addition onto the house which includes a giant bathroom.

2bthrm1

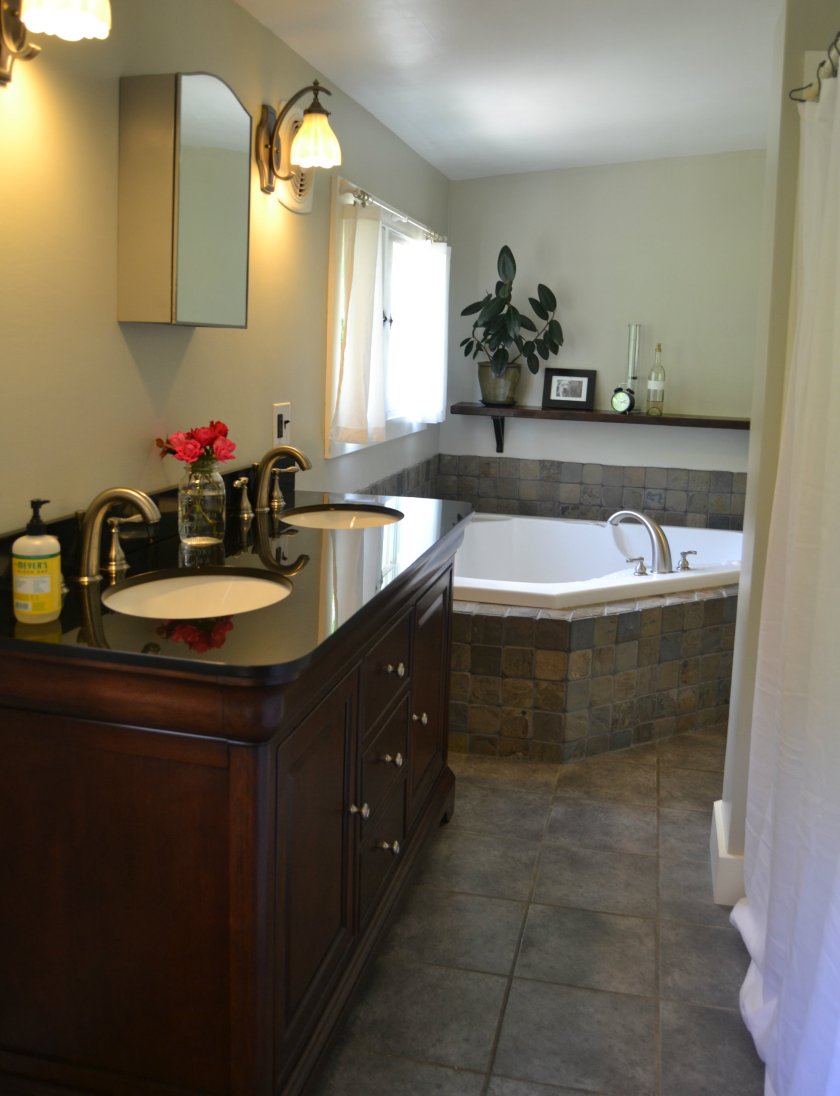
We didn’t really think one bathroom would be a problem when we moved in, but as we lived in the place, we realized how much one was needed on the second floor. Additionally, our realtor made it clear that not only would we see a big return on the investment, she’d actually struggle to sell the house without at least another half bath.

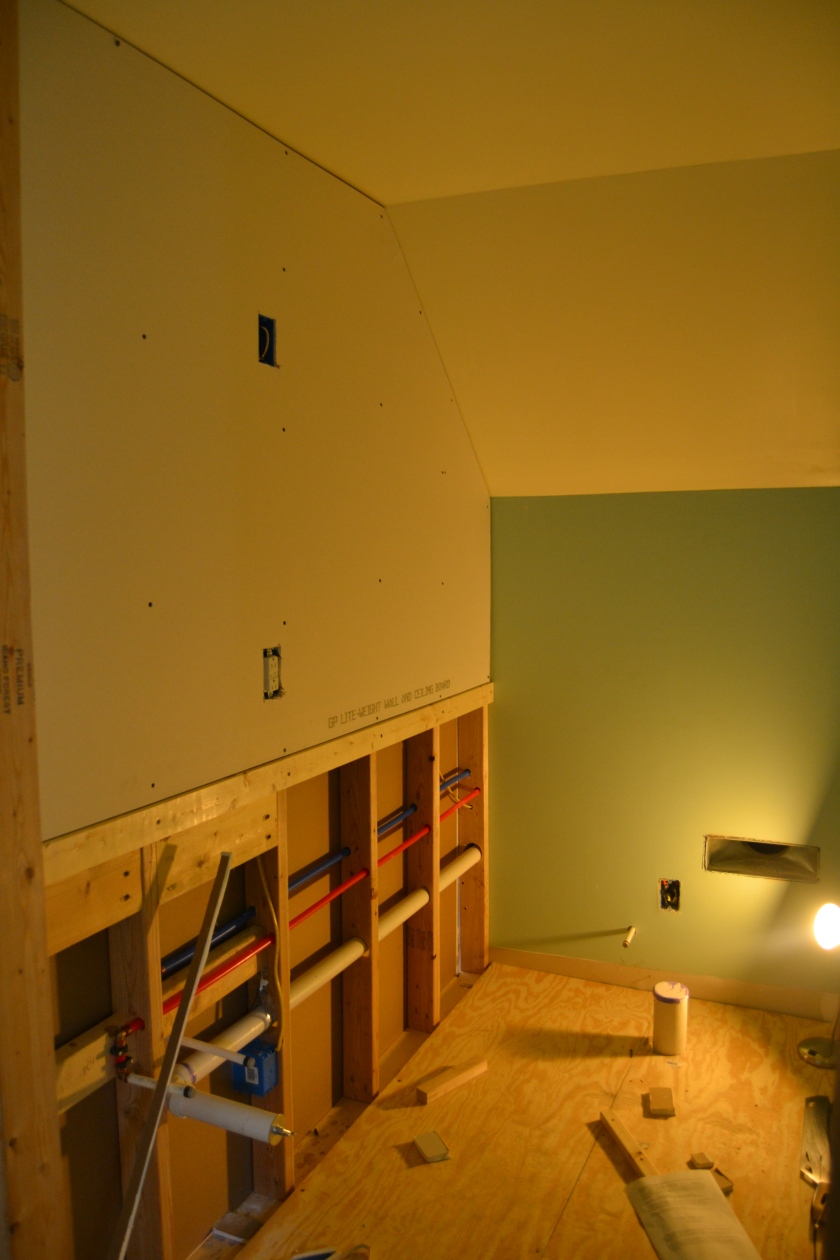
We set to work turning one end of our son’s bedroom into a small half bath, and were pretty stoked at the results. This wall…

DSC_1231

…became this wall…

973rdbed

…on the other side of which exists this.

91hlfbth

It’s a tiny bathroom, but it does the job it’s (ahem) supposed to do.

As I look back on this list, I feel some definite accomplishment. I think our dream, one day, will be to take an old house from sad and forgotten to beautiful all on our own. This house had most of the hard-core renovations done for us, and we just had to come in and make it more functional and beautiful. Even though we’re not finished with this one, I’m already looking forward to our next big project, one that will be completely ours. I can’t wait to decide everything from the start someday (be careful what you wish for, Audrey).

Keep reading; I plan to do some more work on the master bedroom this weekend and I’m also planning a bit of plant care advice soon!

Tiny Bathroom: Finished!

Ok, well there’s no door on it yet (is that important?). Peter plans to build that in the coming week or two. But here it is, the tiny bathroom that we added to our 1900 home in an effort to bring it into the modern era.

Sorry about the photos; this room is impossible to photograph. Well, that’s probably not true. I’m sure there are some people who can do it. But they run other blogs.

DSC_0298

It’s small, but it really doesn’t feel so small when you’re in there. That toilet, by the way, is the third one we’ve attempted to put in here. The first toilet, from Home Depot, was cracked in half when we opened the box. The second one, also from Home Depot, made it all the way through installation, only to leak water from the connection between the bowl and the tank. Finally, we bought one from a local place (I’ll have to find out the name) and we now have a toilet.

We really tried to go classic on some of the finishes in here. The sink is a Deco throwback that I found on Vintage Tub and Bath. I love the retro faucet I picked up there, too.

DSC_0300

Over the last few years, I’ve come to realize that a nicer switch plate really does make a huge difference in the feel of the room, so for $4-5 more than a plain one, I picked up these.

DSC_0296

When it came to mirrors, I was done spending money. Why are mirrors so expensive? I ended up buying a cheap black frame from TJ Maxx and taking it to Lowe’s, where they cut a piece of mirrored glass and even installed it and disposed of the frame’s original glass.

DSC_0299

Well, that’s about it for the tiny bathroom. There’s not much to it, so there’s not a lot to photograph. We’re glad the project is over, and glad that the second story of the house is put back together. Even when you don’t go up there every day, isn’t it crazy how much having disarray hanging literally over your heads can throw you off your game?

DSC_0301

Sis had to make sure I was doing a good job photographing the room.

Progress in Pictures

Pete spent the weekend drywalling the new bathroom. So there are half walls now…

DSC_0257

DSC_0258

DSC_0267

Above, the view from what’s left of The Boy’s room. Imagine that cut-off doorway moving about 4′ toward you. That’s how we’ll end up with a tiny hallway with a bathroom to your right (as you walk toward yourself in this picture) and the new door to The Boy’s room directly ahead of you.

DSC_0266

Next steps include flooring, wainscoting, painting, trim boards, and the building of both new doors and another wall to finish out that small hallway. Oh, and repainting The Boy’s room, probably. Yikes.

And the installation of fixtures, including this cool sink I found online:

DSC_0268

It’s a very small pedestal sink, but it has an Art Deco era feel to it. I’m looking forward to seeing it up in the room. And I chose an easy-to-do piece of “art” for the wall, too, and it’ll take advantage of another free historical resource, so look out for that!

I spent the weekend giving the back of the house a new coat of paint and new trim paint, all while chasing The Boy and watching the dog (who had to be tied up, much to her disappointment and frustration). It looks pretty sweet back there now.

DSC_0261

Porch paint will happen when we get all interior renovations, especially those including drywall, finished.

DSC_0262

Nothing matches old windows.

DSC_0264

And finally, never underestimate the potential of one of the broken babies (or as my Grandma Noel would say, beebees) on the discount rack at your local home improvement megastore. This Drift rose was so sad when I saved it for $3 last year! Look at her now!

House Goals: SPRING 2016

I generally don’t make New Year’s resolutions. I just never stick with them, and I don’t find the new year particularly inspiring. I’m much better at setting some goals come March, when the weather starts turning nicer. I find THAT inspiring!

It’s a good time to start thinking about some goals for our home this spring. I started this post a few weeks ago, but we’ve made some decisions since then, so there are some edits in here.

  • Decide about adding a half bath upstairs and install it. Or don’t.   We’ve decided we’re putting in a bathroom upstairs.

Our house has only one bathroom. Don’t get me wrong, it’s a lovely bathroom, but there’s only one of them.

DSC_0860

It didn’t bother us when we bought it, but I think over the last four years, we’ve come to realize it’s a bit of a danger for resale. We’ve thought about four or five ways we could add a tiny half bath on the second level, and I think we’ve settled on the one that would work the best and be most cost efficient while preserving all available closet spaces.

DSC_1225

No worries, the picture is just the upstairs landing, not the new location of the bathroom. After some conversations with the lady who sold us our house discussing the return on investment, we’ve decided it’ll be worth it, both for the resale value and quickness of sale when it’s time. We had the plumber out early this week to discuss it, and all systems will be go starting this coming weekend. Pete gets to build a wall and rip out a floor, lucky guy.

  • Finish all of the outdoor spaces. Repaint the porches.

The house has four porches. The back and south porches are mostly done. The north porch needs paint (or at least a good power washing). The front porch needed a whole lot of help, since we discovered some dry rot and other issues last summer. Peter finished rebuilding the front porch railings last weekend! It’s now painted (and ready to post about soon, I guess).

DSC_1111

  • Power wash and generally beautify the outside of the house.

We haven’t kept up with yearly power washing, and it shows. It’s time to clean this baby up, touch up paint all over, and generally make her look like new.

power washing
Hello, original house color…funny seeing you here.

There’s a good possibility some of the trim will need repainted.

And I want to finish up my gardens. I’m looking forward to a really lovely year in the garden, since so much of what I planted in the last few years will reach maturity. Last year was a good year…

DSC_1045

…but this year will be better. I’m working on a post about planning and planting a perennial garden and ways to ensure nice color combinations and seasonal variety.

And one thing I really love about this time of year is that housework doesn’t only happen on the weekends; we mulched and mowed a bit last night after work. The Boy ran around, didn’t watch a moment of TV all evening, and drove his father nuts about riding on the lawn mower got to ride on the lawn mower a lot.

IMG_0699
Shoveling…something…?
IMG_0700
Pile o’ mulch.
IMG_0702
Watching and waiting for his Daddy to pick him up on the mower.
IMG_0703
Done for the night.

I love that we can come home and spend a couple more hours out in the sunshine, and I love falling into bed completely exhausted afterward! I love spring!

So those are our springtime goals at the Huffaker House. Most of them are outdoor projects, which I love, but there is also a major change coming to the basic layout of the house in the new bathroom. It might sound like a lot of work, but honestly, there’s not much else I’d rather do. I might be messed up, but I really love working on our house, and I love knowing that we’re taking care of this old lady.

cropped-cropped-image.jpg


Blog - Social Media for Librarians

...is worth doing right.

Sewcialists

A Sewing Blog for Everyone

oonaballoona™ | by marcy harriell

...is worth doing right.

True Bias

...is worth doing right.

Buzzmills

...is worth doing right.

Mrs. Hughes

Retro Inspired Sewing

Cloning Couture

Exploring the world of couture sewing

Thread Bear Garments

I like to sew.

try curious

...is worth doing right.

American Duchess

...is worth doing right.

Andyland, USA

...is worth doing right.

The Dreamstress

...is worth doing right.

Blog - Made by Rae

...is worth doing right.

Francois et Moi

Making a Handmade Modern Home one DIY project at a time.